

Harsh Nordic winters leave behind more than melting snow. Freeze–thaw cycles, ice damming, and rapid snowmelt silently compromise roofs, foundations, and drainage systems. Without a systematic spring inspection, these hidden damages escalate into costly structural failures. This guide walks you through a comprehensive, step-by-step checklist designed specifically for premium Nordic residences, helping you identify vulnerabilities early and maintain property integrity after severe winter conditions.
Table of Contents
- Prerequisites And Preparation Before Starting Your Spring Maintenance
- Roof And Gutter Inspection And Repair
- Foundation And Soil Grading Checks
- Drainage System And Sump Pump Testing
- Deck And Wooden Structures Maintenance
- Window And Door Weather-Stripping And Seal Checks
- HVAC Spring Servicing
- Common Mistakes And Troubleshooting
- Expected Outcomes And Performance Metrics
- Explore Premium Nordic Homes Protected By Expert Maintenance
- Frequently Asked Questions
Key takeaways
| Point | Details |
|---|---|
| Inspect immediately after snowmelt | Early detection prevents escalation of freeze–thaw damage and costly emergency repairs. |
| Prioritise safety and preparation | Proper tools, timing, and professional contacts reduce inspection risks and improve efficiency. |
| Address roof and drainage first | These systems protect structural integrity and prevent water intrusion into foundations and basements. |
| Balance DIY with professional help | Minor fixes save money, but structural issues require expert assessment to avoid failures. |
| Track outcomes with clear metrics | Timely completion and testing confirm successful maintenance and long-term property protection. |
Prerequisites and preparation before starting your spring maintenance
Before climbing ladders or inspecting foundations, assemble the right tools and plan your approach. Establish safe access tools including binoculars, ladder stabilisers, and PPE before starting any inspection. This preparation phase prevents accidents and ensures efficient work.
Schedule inspections in early spring, immediately after snowmelt but before heavy rains arrive. Check local weather forecasts for dry windows spanning at least three consecutive days. Contact professional service providers now to secure availability for structural assessments or specialised repairs you cannot handle yourself.
Essential inspection toolkit:
- High-quality binoculars for safe roof observation from ground level
- Stabilised ladder with non-slip feet and safety rails
- Personal protective equipment: gloves, safety glasses, sturdy footwear
- Moisture metre for detecting hidden water intrusion
- Digital camera or smartphone for documenting damage
- Notepad or maintenance app for tracking findings
Prepare basic repair materials for minor fixes you can address immediately. Stock caulking, weather-stripping, deck sealant, and gutter cleaning tools. Identify triggers requiring professional help: cracks wider than 1.8 mm, structural movement, or extensive water damage.
Pro tip: Use binoculars to inspect your roof thoroughly from ground level. This eliminates fall risks whilst allowing you to spot lifted shingles, damaged flashing, and ice dam residue safely.
| Inspection Phase | Recommended Timing | Weather Requirements |
|---|---|---|
| Initial visual survey | Within 1 week of snowmelt | Dry, daylight hours |
| Detailed structural checks | Weeks 2-3 post-melt | Consecutive dry days |
| Professional assessments | Within 3-4 weeks | Before spring rains |
Understand your property’s Swedish homeowner maintenance essentials to prioritise tasks effectively. Safety always comes first. Never rush inspections or attempt repairs beyond your skill level.
Roof and gutter inspection and repair
Your roof endures relentless punishment during Nordic winters. Ice dams cause common shingle lifting and flashing damage that compromises waterproofing. Start your spring maintenance here to prevent cascading water damage throughout your property.
Use binoculars to examine your roof systematically from ground level. Look for lifted, cracked, or missing shingles. Inspect flashing around chimneys, vents, and roof valleys for gaps or corrosion. Ice dam residue often leaves telltale streaking or granule loss on shingles.
Critical roof inspection checklist:
- Shingle condition: curling, cracking, or missing sections
- Flashing integrity around penetrations and edges
- Ice dam damage zones near eaves and valleys
- Granule accumulation in gutters indicating shingle deterioration
- Sagging areas suggesting structural stress or water retention
Move to gutters next. Thoroughly clean gutters and ensure downspouts extend at least 4 to 6 feet from your foundation. Clogged gutters overflow during spring rains, directing water against foundation walls and into basements. Approximately 35% of homeowners skip this crucial step, risking significant water damage.
Gutter maintenance procedure:
- Remove all debris, leaves, and sediment from gutter channels
- Flush gutters with water to check flow and identify leaks
- Inspect and tighten all mounting brackets and hangers
- Verify downspout extensions direct water away from foundation
- Repair or replace damaged sections immediately
Prompt roof repairs within 2 to 3 weeks reduce future costs by up to 40%. Delaying allows minor damage to expand through subsequent freeze-thaw cycles. Small repairs now prevent major replacements later.
Pro tip: Install gutter guards after cleaning to reduce debris accumulation. They pay for themselves by reducing maintenance frequency and preventing overflow damage during heavy spring rains.
Document all findings with photographs. For extensive damage or structural concerns, consult the NextDay Inspect checklist and contact roofing professionals immediately. Reference your house maintenance schedule essentials to track completion and plan follow-up inspections.
Foundation and soil grading checks
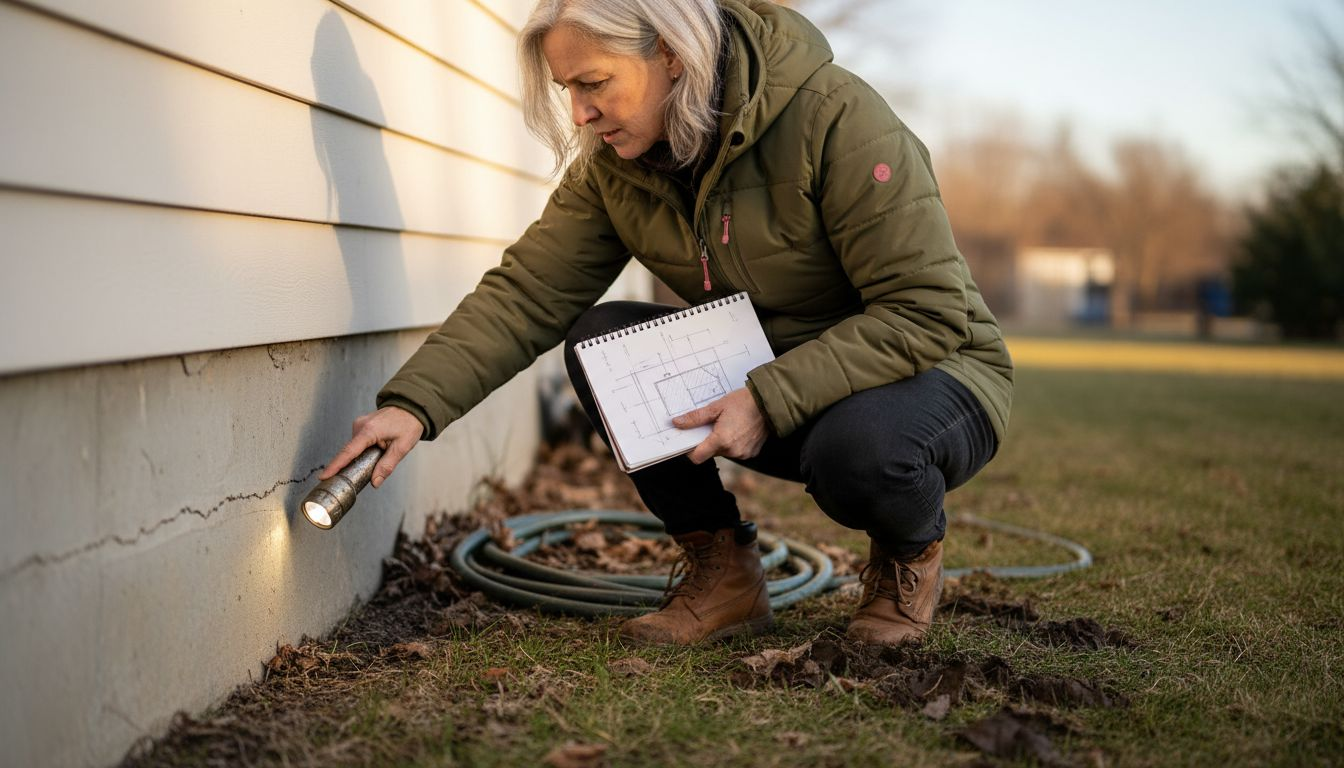
Freeze-thaw cycles wreak havoc on foundations. Water seeps into microscopic cracks, freezes, expands, and fractures concrete. Spring inspections catch these vulnerabilities before they compromise structural integrity.
Walk your property’s perimeter methodically. Inspect foundation for cracks wider than 1.8 mm, roughly the width of a dime. Smaller cracks may be cosmetic, but anything exceeding this threshold requires professional assessment to prevent structural failure.
Examine soil grading carefully. Proper soil grading with 6-inch slope over 10 feet prevents water pooling against foundation walls. During rapid snowmelt, improper grading channels thousands of litres directly into basements and crawl spaces.
Foundation inspection priorities:
- Vertical cracks wider than 1.8 mm indicating settlement or heaving
- Horizontal cracks suggesting serious lateral pressure
- Step cracks in masonry walls showing structural movement
- White efflorescence deposits indicating moisture intrusion
- Soil pooling or standing water within 3 feet of foundation
Check for soil erosion near foundation walls. Winter runoff often washes away protective grading, creating depressions that trap water. Fill these areas with compacted soil sloped away from your home. Ensure soil levels remain at least 15 cm below wooden sill plates to prevent rot.
| Foundation Issue | Severity | Recommended Action |
|---|---|---|
| Hairline cracks (< 1.8 mm) | Low | Monitor and seal with flexible caulk |
| Cracks 1.8-6 mm | Moderate | Professional assessment within 2 weeks |
| Cracks > 6 mm or horizontal | High | Immediate structural engineer consultation |
| Active water seepage | Critical | Emergency waterproofing and drainage repair |
Seal minor cracks yourself using flexible, waterproof concrete caulk. For significant damage, consult your property maintenance checklist steps and engage structural engineers promptly. Foundation repairs grow exponentially more expensive with delays.
Drainage system and sump pump testing
Spring snowmelt generates enormous water volumes in short timeframes. Your drainage systems and sump pump must function flawlessly to prevent basement flooding and foundation damage.
Start by clearing debris within two feet of all drainage outlets, catch basins, and your sump pump pit. Sump pumps should be tested by pouring water to activate float switches, ensuring readiness for spring rains. This simple test confirms mechanical function before you need it urgently.
Sump pump testing procedure:
- Remove sump pit cover and clear any debris or sediment
- Pour approximately 5 litres of water slowly into the pit
- Verify float switch activates pump when water reaches trigger level
- Confirm pump discharges water completely and shuts off properly
- Test battery backup system by disconnecting mains power
- Listen for unusual noises indicating mechanical wear
Inspect all downspouts and drainage channels systematically. Verify they discharge water at least 4 to 6 feet from your foundation. Check for clogs, disconnections, or damage from snow load or ice expansion. Repair issues immediately, before spring rains test your systems.
Critical drainage maintenance points:
- French drains and perimeter drainage channels clear of sediment
- Catch basins free of leaves, debris, and ice residue
- Surface grading directing water away from all building areas
- Drainage discharge points functioning and unobstructed
- Underground drainage pipes intact without root intrusion
Pro tip: Install a water alarm in your sump pit and basement floor drain areas. These inexpensive devices alert you immediately if water levels rise unexpectedly, preventing extensive flood damage whilst you’re away.
Test your sump pump monthly during spring and summer. Regular testing catches failures early and builds confidence your system will protect your property during severe weather events. Reference your house winter checklist steps to maintain year-round drainage system readiness.
Deck and wooden structures maintenance
Wooden decks, railings, and exterior structures absorb tremendous moisture during winter. Spring maintenance prevents rot, extends lifespan, and maintains safety and aesthetics.
Perform a water bead test on your deck surface. Splash water onto boards and observe behaviour. Water should bead up and roll off. If water soaks in immediately, resale and protection of wood decks requires resealing after winter when surface protection has degraded.
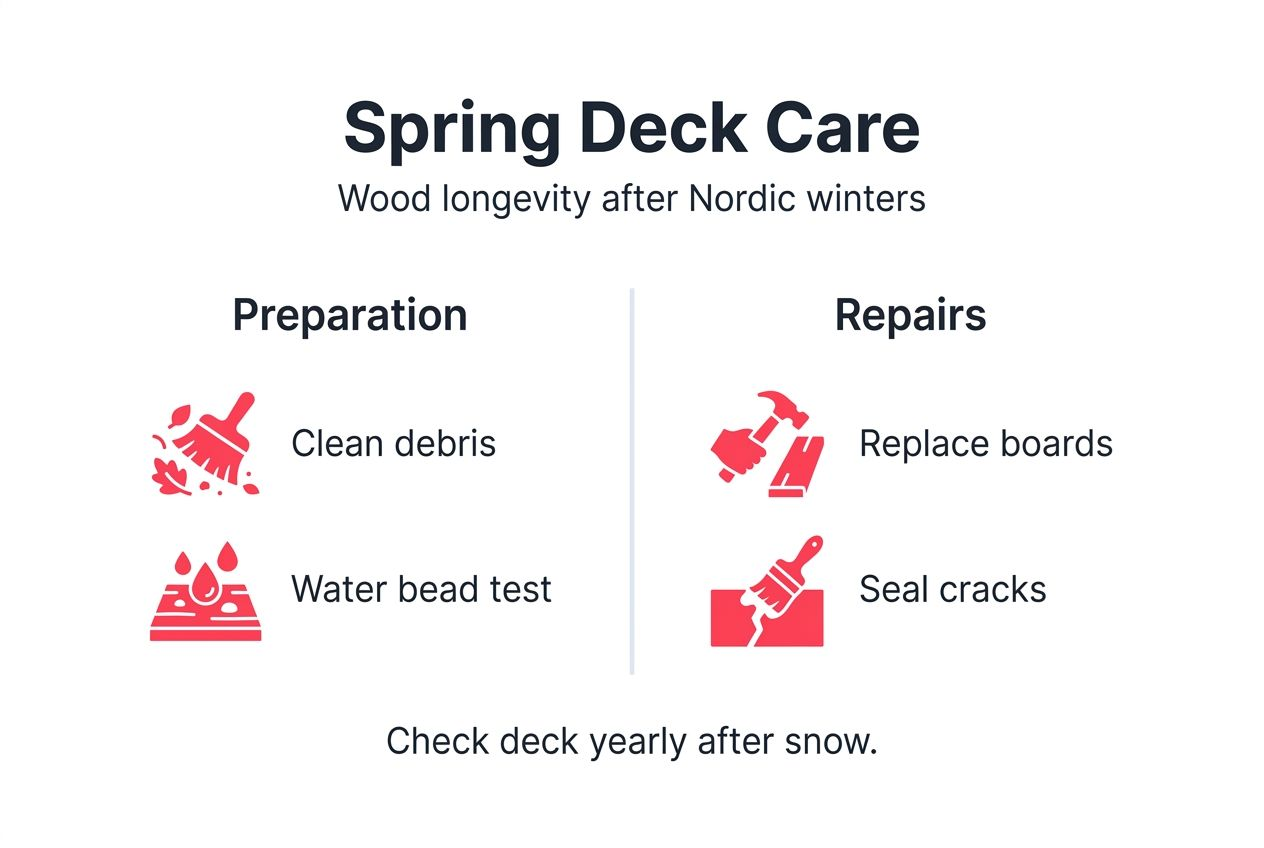
Inspect every board, post, and railing systematically. Look for warping, splintering, loose fasteners, or rot. Test railings for stability by applying firm pressure. Check stairs and landings especially carefully, as these high-traffic areas deteriorate fastest.
Wooden structure inspection checklist:
- Board condition: warping, splitting, soft spots indicating rot
- Fastener integrity: loose screws, popped nails, corroded hardware
- Structural posts and beams for movement or deterioration
- Railing stability and connection security
- Deck ledger board attachment to house structure
Repair damaged components immediately. Replace warped or splintered boards before someone gets injured. Tighten loose fasteners and replace corroded hardware with stainless steel alternatives. Address soft spots aggressively, as rot spreads rapidly through interconnected wood.
Professional deck inspections can extend lifespan by up to 20%. Structural engineers identify hidden damage in ledger boards, joists, and support posts that homeowners often miss. This investment prevents catastrophic failures and extends your deck’s service life significantly.
Pro tip: Apply deck sealant or stain during warm, dry weather in late spring. Allow wood to dry thoroughly after winter moisture before sealing. Two thin coats outperform one thick application for durability and appearance.
Consult your property management maintenance checklist to schedule regular deck maintenance. Consider professional restoration every 3 to 5 years for premium properties, maintaining aesthetic appeal and structural integrity. Explore Kapriz hardwood flooring options if deck replacement becomes necessary.
Window and door weather-stripping and seal checks
Freeze-thaw cycles damage window and door seals, creating gaps that waste energy and allow moisture intrusion. Spring inspections identify compromised weather-stripping before you face high cooling bills.
Weather-stripping deteriorates during winter; inspecting and replacing prevents heat loss and moisture issues. Walk through your property methodically, examining every window and exterior door.
Weather-stripping inspection procedure:
- Check for cracks, tears, or compression in all seal materials
- Test for air leaks using incense smoke or tissue paper on windy days
- Inspect caulking around window frames and door jambs for gaps
- Verify condensation drainage holes in window tracks are clear
- Look for daylight visible around closed doors and windows
Replace worn seals immediately. Modern weather-stripping installs easily and pays for itself within months through reduced energy consumption. Choose high-quality materials rated for Nordic temperature extremes.
Clean window tracks thoroughly, removing dirt, ice residue, and debris that prevent proper closure. Lubricate moving parts with silicone spray, never oil-based products that attract dirt. Verify locks engage fully and windows seal tightly.
Check condensation drainage holes in window track bottoms. These small openings channel moisture outside, preventing water buildup that causes mould and frame rot. Clear blockages with a straightened paperclip or small wire.
Deteriorated weather-stripping increases moisture intrusion risk substantially. Gaps allow humid air to contact cold surfaces inside wall cavities, causing condensation and hidden mould growth. Prevention costs pennies compared to remediation.
Reference property management Swedish homes guidance for premium property standards. Consider professional window inspection if you notice persistent condensation or ice formation. Consult heat shrinking window tint guide for additional insulation improvements.
HVAC spring servicing
Your HVAC system worked overtime during winter. Spring HVAC servicing including filter changes and condenser cleaning improves system efficiency and prevents breakdowns during warmer months.
Start with the simplest maintenance: replace air filters. Install new filters monthly during peak heating and cooling seasons. Clogged filters force systems to work harder, increasing energy consumption and accelerating wear.
Essential HVAC spring maintenance:
- Replace all air filters throughout your HVAC system
- Clear vegetation and debris at least 2 feet around outdoor condenser units
- Schedule professional inspection for coil cleaning and lubrication
- Verify thermostat accuracy and calibrate if necessary
- Test heating and cooling modes to confirm proper operation
- Inspect and clear condensate drainage lines to prevent water damage
Walk outside and examine your condenser unit. Clear leaves, debris, and vegetation that accumulated during winter. Maintain at least 60 cm clearance on all sides for proper airflow. Bent fins reduce efficiency; straighten carefully with a fin comb.
HVAC inspection priorities:
- Air filter condition and replacement schedule adherence
- Outdoor unit cleanliness and vegetation clearance
- Refrigerant lines for damage, corrosion, or insulation deterioration
- Ductwork for leaks, disconnections, or pest intrusion
- Condensate drainage functioning without blockages
Schedule professional HVAC servicing now, before peak cooling season drives up demand and prices. Technicians will clean coils, check refrigerant levels, lubricate motors, and test electrical connections. This preventive maintenance extends equipment life and maintains efficiency.
Verify drainage lines discharge freely outside your home. Blocked condensate lines cause water backup into air handlers, damaging equipment and creating mould growth environments. Pour a cup of diluted bleach through drain lines annually to prevent algae buildup.
Consult your rental property maintenance guide for comprehensive system care schedules. Well-maintained HVAC systems last decades and operate at peak efficiency, saving substantial energy costs whilst ensuring consistent comfort.
Common mistakes and troubleshooting
Even experienced property owners make costly spring maintenance errors. Awareness prevents these common pitfalls and protects your investment.
The most frequent mistake? 35% of homeowners skip spring gutter cleaning, risking water damage and structural harm. Clogged gutters overflow during rapid snowmelt, directing thousands of litres against foundation walls. Schedule gutter cleaning immediately after snowmelt, before spring rains arrive.
Common spring maintenance errors:
- Neglecting gutter cleaning and downspout verification after debris accumulation
- Ignoring small cracks results in worsening freeze-thaw damage and higher repair costs
- Attempting structural deck or foundation repairs without professional expertise
- Skipping sump pump testing until first major spring storm
- Resealing decks before wood fully dries after winter moisture
Do not ignore cracks wider than a dime in foundations or structural members. These indicate serious damage requiring professional assessment. Delaying repairs allows freeze-thaw cycles to expand damage exponentially through subsequent winters.
Refrain from unverified DIY structural repairs on decks, foundations, or roofs. These systems protect your entire property investment. Mistakes compromise safety and create liability issues. Invest in professional assessments for structural concerns.
“The biggest mistake Nordic property owners make is waiting until they see water damage inside before checking drainage systems. By then, you’re managing crisis instead of preventing it. Early spring inspections catch issues whilst they’re still inexpensive to fix.” – Property Management Professional
Pro tip: Combine visual inspections with moisture metre checks behind obvious damage. Water intrusion often extends far beyond visible staining. Detecting hidden moisture prevents mould growth and structural deterioration you cannot see.
Test your sump pump monthly, not just once in spring. Regular testing confirms reliable operation and identifies gradual performance degradation before system failure. A failed sump pump during heavy spring rains floods basements within hours.
Reference your house maintenance schedule essentials to avoid overlooking critical tasks. Systematic approaches prevent oversights and ensure comprehensive property protection throughout the year.
Expected outcomes and performance metrics
Successful spring maintenance delivers measurable results. Understanding these benchmarks helps you verify completion and appreciate long-term benefits.
Complete inspections and minor repairs within 2 to 3 weeks post-snowmelt for optimal protection. This timeline allows thorough work whilst preventing damage escalation. Timely roof repairs within 2 to 3 weeks reduce future costs by up to 40%. Delaying allows weather to worsen existing damage significantly.
Verify sump pump operational readiness through monthly testing. System should activate within seconds of water reaching trigger level, discharge completely, and shut off cleanly. Battery backup should support at least 6 to 8 hours of operation during power outages.
Deck sealing showing water bead tests indicates effective protection. Properly sealed wood repels water, extending lifespan and preventing rot. Professional deck maintenance extends lifespan of wood structures by 20%. This investment pays dividends through reduced replacement costs and maintained property value.
Spring maintenance success metrics:
| Maintenance Area | Success Indicator | Verification Method |
|---|---|---|
| Roof and gutters | No leaks during first major rain | Visual interior inspection after rainfall |
| Foundation | No new cracks or water seepage | Monthly perimeter walks through summer |
| Drainage systems | Dry basement after heavy rain | Moisture metre readings in basement corners |
| Sump pump | Consistent activation and discharge | Monthly testing through spring and summer |
| Deck sealing | Water beads on surface | Visual water bead test after application cures |
| HVAC efficiency | Even temperatures, lower energy bills | Compare utility bills year over year |
Regular maintenance extends property value substantially. Well-maintained Nordic properties command premium prices and attract quality tenants or buyers. Prevention costs fractions compared to emergency repairs or depreciation from neglect.
Track completion dates and outcomes in your property maintenance checklist steps documentation. Systematic records demonstrate care to insurers, support warranty claims, and guide future maintenance planning. Consistent attention protects your investment for decades.
Explore premium Nordic homes protected by expert maintenance
Your property deserves the same meticulous care detailed in this guide. Guestly Homes offers premium Nordic residences maintained to the highest standards, withstanding severe winter conditions through expert care and systematic maintenance protocols.

Our properties exemplify the preventive maintenance philosophy outlined here. From comprehensive spring inspections to year-round care programmes, we protect property integrity and performance. Explore our modern luxury villa with lake view, 4BR grand villa with garden, or 5BR business villa with bathrooms, each maintained to premium standards. Trust comprehensive upkeep that ensures your investment’s longevity and comfort.
Frequently asked questions
When is the best time for spring maintenance after Nordic winters?
Begin inspections within one week of snowmelt completion, typically mid to late March depending on your location. This timing allows access whilst identifying damage before spring rains worsen issues. Complete repairs within 2 to 3 weeks of initial inspection for optimal protection and cost savings.
Can I safely inspect my roof myself after heavy snow?
Never climb onto roofs after winter without professional safety equipment and expertise. Use high-quality binoculars to inspect from ground level safely. This method identifies lifted shingles, damaged flashing, and ice dam residue without fall risks. Reserve roof access for licensed professionals with proper safety gear.
Why is professional inspection recommended for deck repairs?
Structural deck damage often hides beneath visible surfaces. Professionals identify compromised ledger boards, rotted joists, and deteriorated support posts that homeowners miss. Professional assessment extends deck lifespan by up to 20% through early intervention. This investment prevents catastrophic failures and costly replacements.
How often should sump pumps be tested in spring?
Test sump pumps monthly throughout spring and summer. Regular testing confirms reliable operation and identifies gradual performance degradation before system failure. Pour 5 litres of water into the pit to verify float activation, discharge function, and proper shutoff. Test battery backup quarterly by disconnecting mains power.
What signs indicate foundation damage needing urgent repair?
Cracks wider than 1.8 mm, horizontal cracks at any width, or step cracks in masonry walls require immediate professional assessment. Active water seepage, white efflorescence deposits, or visible wall movement indicate serious structural issues. Contact structural engineers within days, not weeks, when these signs appear to prevent catastrophic failure.
Recommended
- 8 Essentials for a Swedish Homeowner Maintenance Checklist – Guestly Homes
- 7 Key Steps for Your House Winter Checklist Explained – Guestly Homes
- 6 Essential Steps for an Effective House Maintenance Schedule – Guestly Homes
- 7 Steps to a Property Maintenance Checklist for Owners – Guestly Homes
- Checkliste Immobilienmanagement 2026 für NRW-Eigentümer
- 6 Essentiële tips: lijst van inbraakwerende kozijnen